photography of the Quabbin Region & beyond

Tundra Graphics

  • Home
  • Galleries
  • Blog
  • Bio
Home / Blog / 2016

Share
December 14, 2016

Using Humidification and Electrostatic Force in the Handling and Digitizing of 19th Century Latin American Newspapers

Often when scoping out digitization projects, devising complementary conservation treatments that assist in digital capture are challenging aspects of overall workflow design. And so it has been the case with our recent efforts at UConn Library on a set of 19th century Latin American newspapers from the University's archives and special collections.

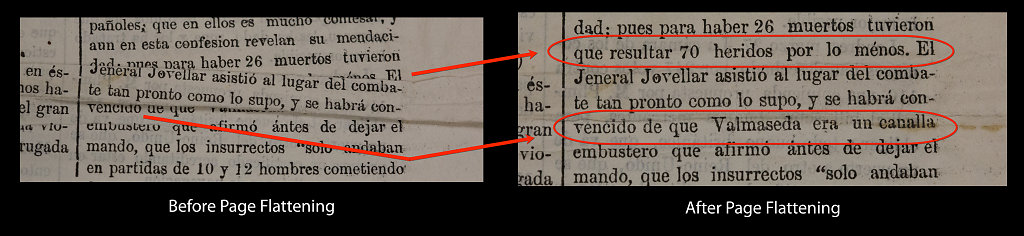
Over time the thin, pulp-based and acidic periodicals have become brittle, broken, and in some instances creased in ways that obscure the print. Humidification is a common conservation technique that can be used to relax these creases in order to once again flatten the paper and allow for subsequent digital capture of hidden text. In the following 40 second time lapse video my colleague and UConn Library Conservator, Carole Dyal, employs her lab's humidification dome to start the initial prep work on a two page spread. The entire process in real time takes approximately 15 minutes per sheet.

Once the pages are humidified, they are then sandwiched between layers of polyester webbing and blotter on the lab's large work tables. On top of this goes a heavy 1/2 inch piece of plexiglass which acts as an even surface weight across the sheets below. The before and after transformation to the paper that results from this careful process is quite remarkable and greatly assists my lab's subsequent photographic efforts toward creating archival-quality page images.

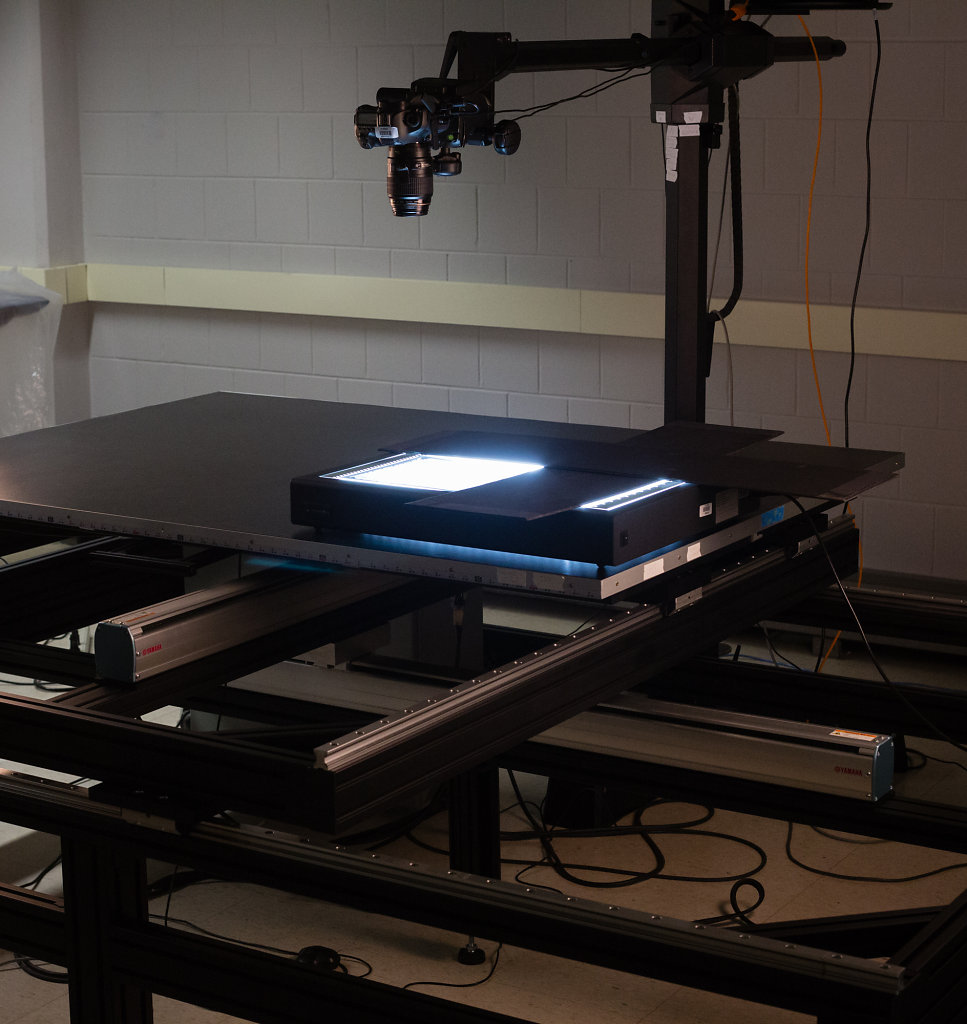
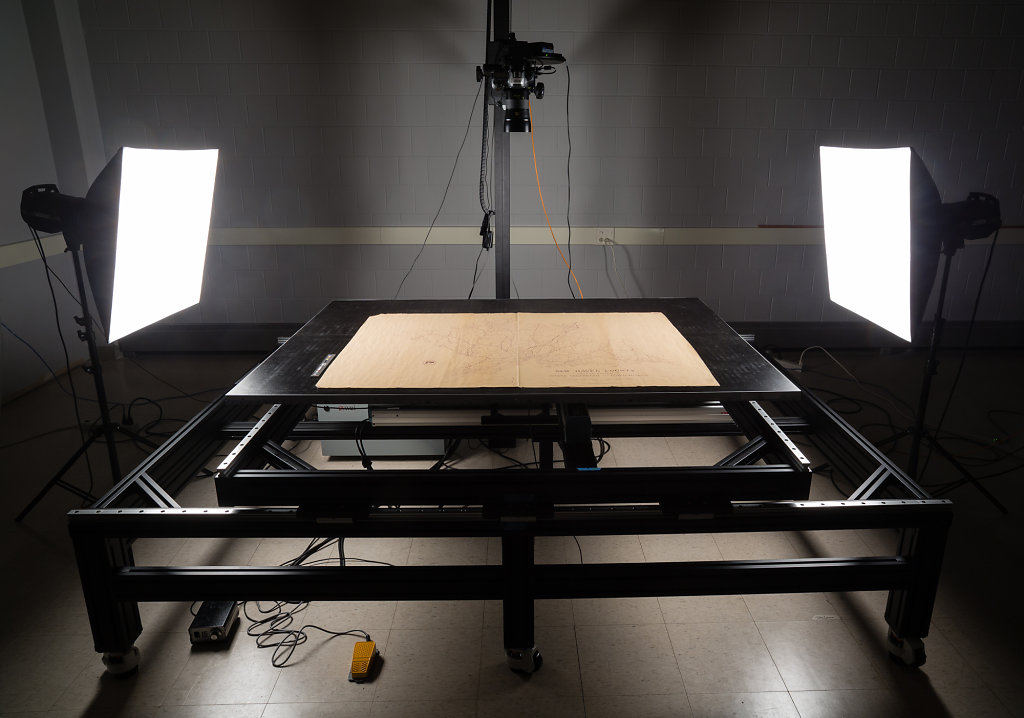
Brittle paper that ultimately has become broken presents its own complications often in the form of a jigsaw puzzle. Fortunately, one of the unique design features of the digital production lab's X-Y table is its controllable electrostatic surface that can be used to temporarily hold down folded paper remnants during shooting. These remnants can be particularly problematic at newspaper folds where broken page sections can "spring" in the air and become difficult to lay out flat with their corresponding halves.

UConn Digital Production Lab X-Y Table System

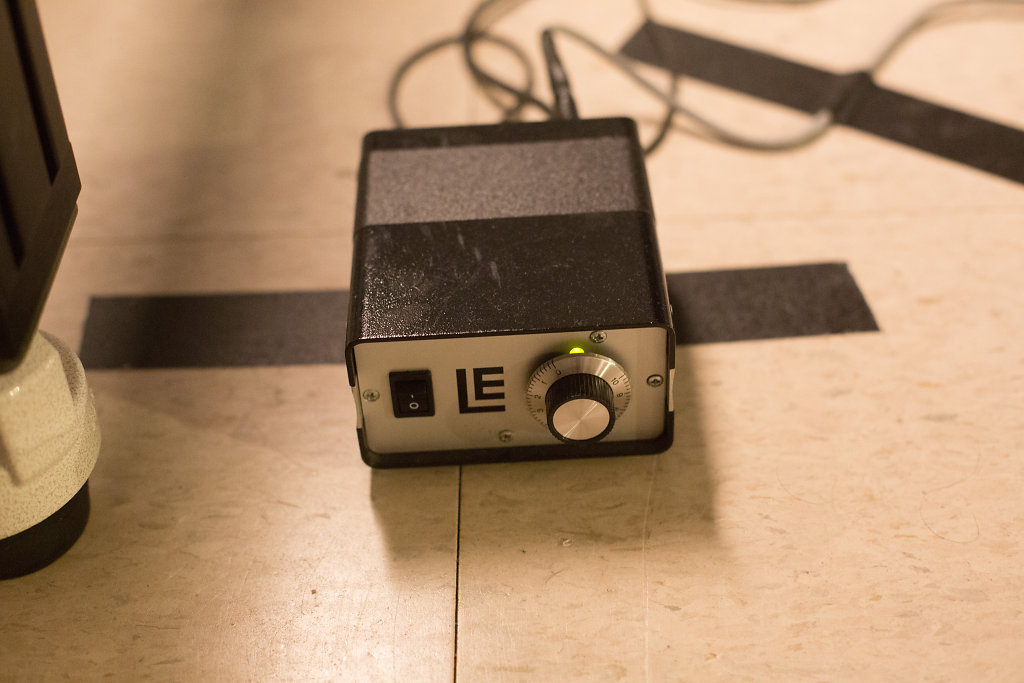
In practice, the table's electrostatic force is first fine-tuned through an adjustable controller. With such brittle and light weight paper it is important to regulate the table's downward pull in order to avoid damaging the fragile pages:

Electrostatic Table Controller

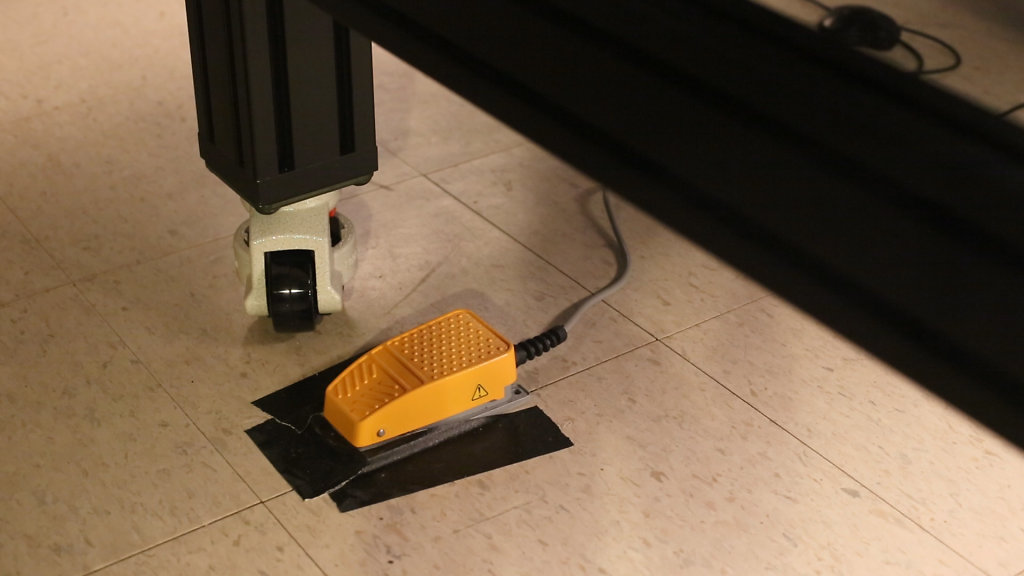
From there, the photographer can turn the electrostatic force completely on or off with a foot switch that is cabled to the controller:

Electrostatic Table Foot Switch

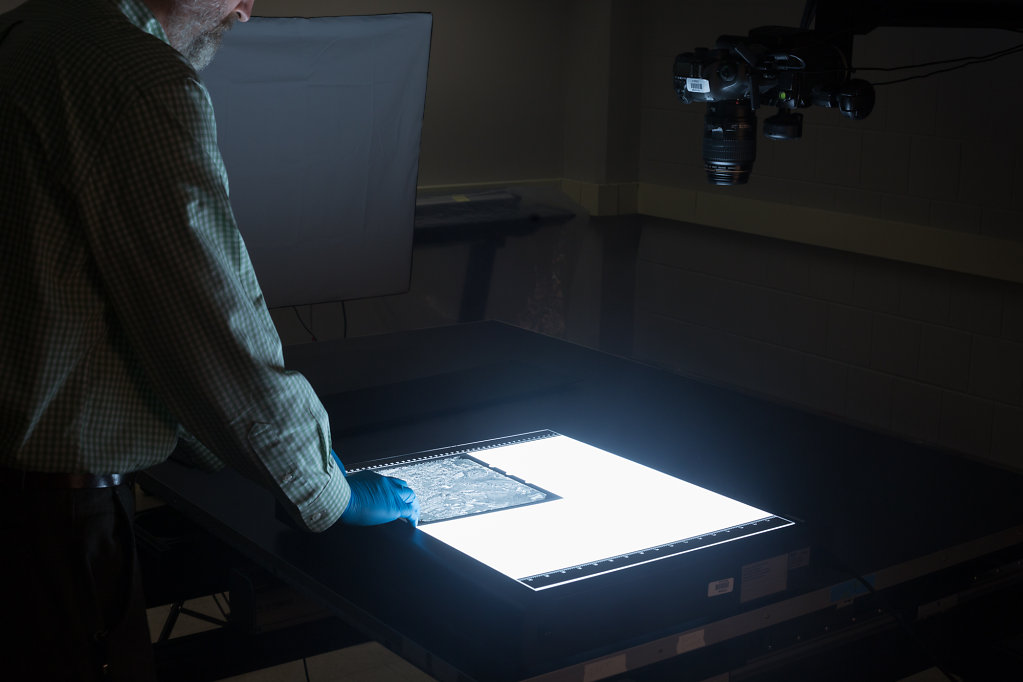
Fragile, oversized materials like old newspapers are often best transported to and from the deactivated table surface with a heavier, alkaline carrier base. For this project .010 inch folder stock, cut to size, is being used.

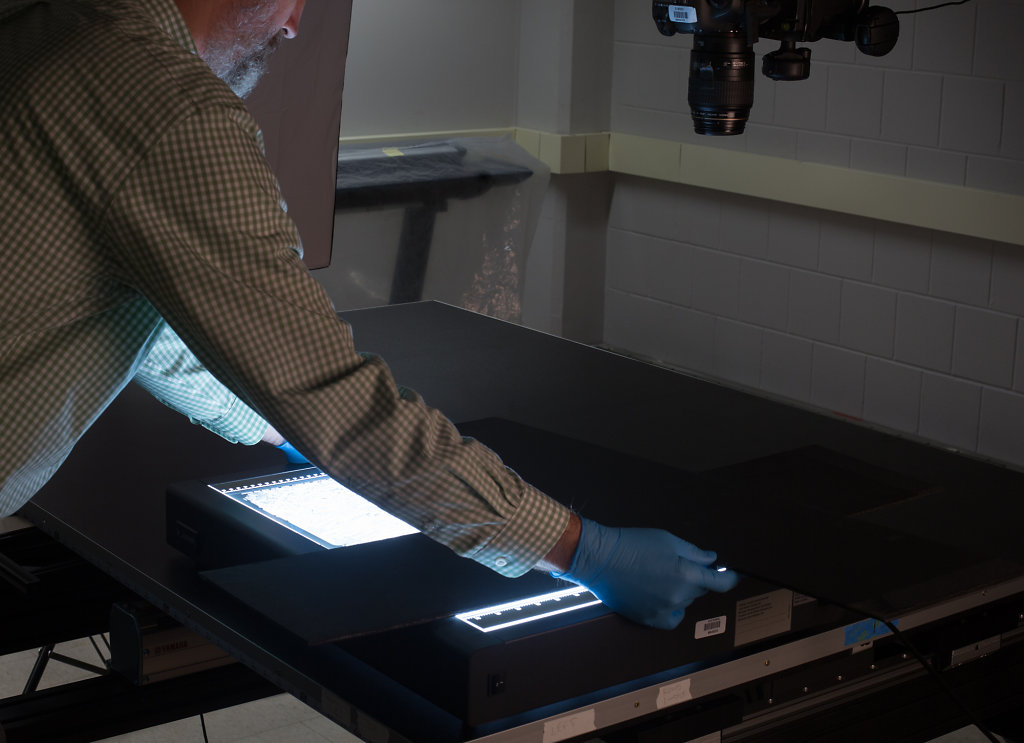
Once on the table, a problematic fold can be addressed with selective application of electrostatic force coupled with some gentle, manual pressure. If you listen carefully, you can hear me hit the stomp box on the floor to activate the system's foot switch. The foot switch allows for effective hands-free control, which enables the photographer to coordinate the table's downward pull in combination with their own physical manipulation of the paper.

Here's a closer look at the same technique in action. What was once a broken line of text is again made legible and ready for overhead camera capture...

Turning over page 1 in order to expose page 2 for shooting presents a similar handling issue...

In this instance, the paper break is harder to elegantly fit together as the delicate page edges are a bit more ragged on this side. However, the text is at least made readable through the process, even while not being perfectly in line.

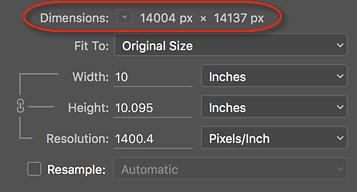
Individual images are then taken of each page at 400ppi. In between shots, the X-Y table (not the newspaper) is moved along its Y-axis to position the next page directly under the overhead camera. In this way, manual handling of such fragile material is minimized and in turn made more automated, faster and precise.

Finally, a word about the periodicals and their cultural significance. They were originally published in the Bolivian port city of Antofagasta just prior to the 1879-1883 War of the Pacific which pitted an alliance of Bolivia and Peru versus Chile.

Antofagasta, Chile, https://goo.gl/maps/8Zdc8sAbECH2

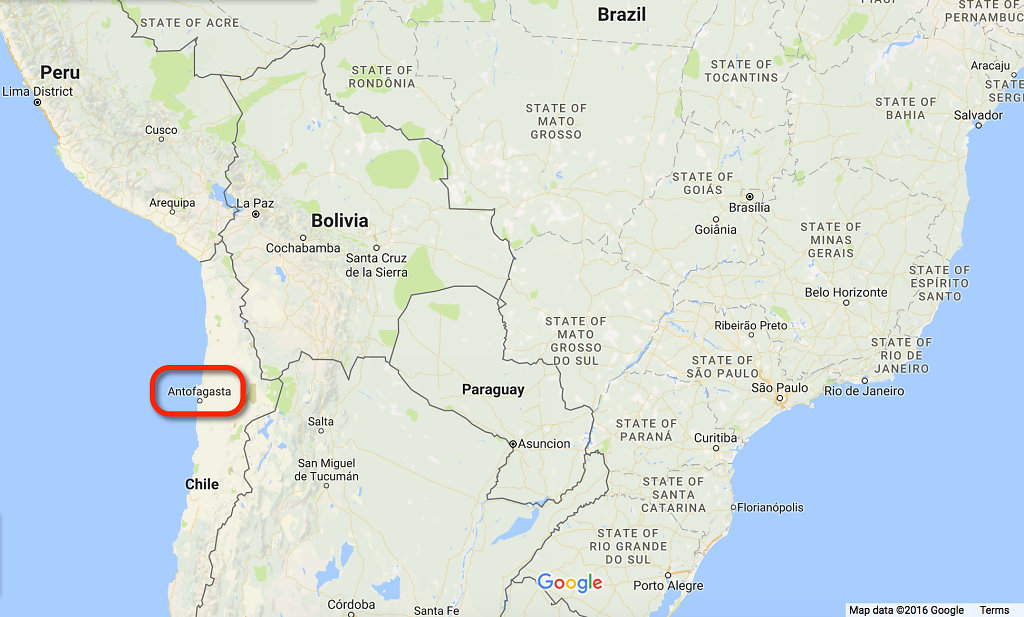
Chile would go on to win the conflict and capture the city that has remained important through time not only for its access to the sea but also for its proximity to the rich mineral resources of the area. Printed during a period of regional strife and subsequent transition, the newspapers in their digital format will soon offer researchers new, more detailed access to this important chapter in Latin American history.

Share
October 4, 2016

Digitizing Large Format Aerial Photography Transparencies: Part II

In Part I of this post, I summarized the workflow steps employed in digitizing 9x9 large format film from a 2002 aerial survey of Connecticut. In Part II, I'd like to take a deeper dive into the resulting image and compare it with similar aerials taken through time that used different film stocks and digital technologies.

The 2002 image that I converted in our lab was taken above Watertown, CT. In addition, the USGS hosts Watertown aerial photos from 2008 and 2012. Here's a look at these three surveys in succession:

Though they all have the same 1:1 aspect ratio, only the 2008 and 2012 images were shot at the same scale. So, let's zoom in to a particular area of common interest among the three, resize them all to a comparable resolution and do a more precise and balanced visual examination. On the 2002 survey, I've outlined part of the playing fields on The Taft School's campus that appear in all of the aerials:

Taft School Campus Area of Detail
Here's a look at the area of detail through time:

While digitizing the 2002 aerial photo, I also included the film's edge information which like many types of film stocks can contain a multitude of coded technical information. In this case, "Wild 15/4" can be found along the film's upper border.

This indicates a Leica aerial camera was employed in the original photography. Additionally, the dark manner in which water is rendered throughout the town and the clear separation of conifer and deciduous foliage suggest the use of black and white infrared (B&WIR) film. Digitized at 14,000px along the long edge, the film's grain is clearly discernible. But so is Taft's football field end-zone lettering and pole vault area:

2002 Taft School Football Field

For the 2008 survey, color film stock was the choice of the day's flight which occurred on April 3rd of that year. Though the film's edge information is cropped out of this USGS-sourced image, the file downloads from the USGS' site as part of a zip-archived data set. Within this bundle, an invaluable XML file exists that contains interesting technical and process metadata on the image. There you can learn that the USGS outsourced the original shoot to AeroMetric, Inc. who used a Zeiss Intergraph aerial photography film system. Interestingly enough, in the metadata's <procdesc> field it is also noted that the image was dodged. Perhaps this may have contributed to some of the grain in the final product. Here's Taft's football field once again. Though the sun's angle is different between shots, observe how the track's lane markers and bleacher seats can act almost like comparative resolution targets in the 2002 and 2008 images:

2008 Taft School Football Field

By 2012, the Watertown survey was a born digital asset. According to the metadata in the shoot's bundled data set, USGS contracted with Kentucky's Photo Science, Inc. for the work. As an interesting aside, Photo Science and AeroMetric, along with Watershed Sciences, merged the following year to form Quantum Spatial. Once again, a Zeiss/Intergraph imaging system was employed in the 2012 flight. However this time the device includes the "Digital Mapping Camera (DMC)" designation in its name. As a result, the view from 10,000' was not projected onto large format film but was instead passed onto a mosaic of digital sensors, most likely DALSA CCD chips. The solely digital workflow resulted in a very clean signal:

2012 Taft School Football Field

Today's current state of the art aerial camera rigs include the 250MP Leica Geosystems’ DMC III which can capture up to 25,000+ pixels across a single CMOS chip, and Vexcel Imaging's UltraCam Eagle II, a system originally co-developed with Microsoft that can use a variety of interchangeable lenses on its multiple CCD sensor arrays.

Finally, if this tale hasn't gotten you fired up yet about aerial imaging, then try Leica's DMC III marketing video below. It's like a great pre-game locker room speech, not necessarily for Taft's football finest, but for those looking to further hone Occam's razor in the name of supreme image-making geekery!

Share
September 30, 2016

Digitizing Large Format Aerial Photography Transparencies: Part I

One of the challenges (and rewards) of managing a digital production lab for a university research library is working with the wide assortment of analog formats that are collected within its archives, special collections, and map library holdings. For instance, we've recently begun conversion work on a 2002 aerial survey of Connecticut that was originally shot on 9"x9" positive black and white film.

Aerial photo transparencies are commonly turned into contact prints soon after the film is developed. And indeed, we have a large collection of these prints that we've digitized over the years at UConn. This type of reflective media can be converted in a couple of ways: you can either scan, or digitally photograph the prints at a sufficient spatial resolution. The Federal Agencies Digitization Guidelines Initiative (FADGI) suggest 6,000 pixels across the long dimension of the image area.

When tasked with digitizing original transparencies, however, certain challenges arise. Unlike reflective media, light needs to be evenly shined through transmissives with a light sensing device placed on the opposite side of the illumination source in order to capture an image. Aerial photography service bureaus, for example, employ expensive specialized large format film scanners that can handle the film's actual 10"x10" physical size (both cut and rolled), lighting needs, and high spatial resolution requirements.

Leica DSW700 Scanning Workstation, from http://www.gis.si/en/storitve/historicni-aeroposnetki

As a general rule, photo film contains considerably more visual detail than derivative prints made from film. And indeed, FADGI recommends a considerably greater spatial resolution for the digitization of film vs. reflective prints in this format: 10,000 pixels across the long dimension for aerial transmissives. So, the promise is there for some striking image data if you can engineer a suitable conversion process that is sensitive to both the format's particular handling needs and visually rendered potential.

For my own initial thinking on workflow architecture, the demonstrated design concepts behind both high resolution multi-shot camera backs, and DIY Arduino-controlled film scanners seemed like good theoretical entry points. In addition, I wanted to leverage and re-purpose gear that I already had in the lab. So, I thought, let's start with one of the same light boxes that we use for single-shot medium format film conversion. But instead of using a regular stationary copy stand, let's put the light box on the lab's new X-Y table. Then, let's program the table's movements and camera's controls to create automated, high resolution mosaics of a given 9x9 aerial transmissive. Finally, let's see if the resulting image tiles can be merged into a single, high resolution image for the entire piece of film. If that proves successful, then we'll be able to determine whether or not the image meets FADGI's 10,000 pixel guideline and also better understand the entire workflow's potential for production.

Here's what the concept looked like in staging:

9x9 Aerial Photography Film on Top of Kaiser Prolite Scan Lightbox
Masking Light Outside of Transparency
Ready to Go...

Initial shooting was done with a 50MP Canon 5DsR camera and 100mm macro lens combo. The tandem geometries of the camera's aspect ratio and the 10"x10" (actual size) of the 9x9 format meant that I would make most efficient use of the rig when shooting mosaics in a 2x3 pattern for a total of six images per transparency. Here's a video of the overhead camera's view of the automated system during a shoot in this configuration:

Image tiles were auto-imported directly into Lightroom off of the tethered camera as they were captured. From there, they took a quick trip en masse to Photoshop for final composite image merging. What resulted was an image that was roughly 14,000 pixels across the long dimension, captured as 16 bit data which left plenty of latitude for any needed tone adjustments to more fully express the image's dynamic range. This was encouraging stuff!

In Part II of this post, I'll take a closer look at this file and compare it with other aerial photographs of the same region of Connecticut taken over time with different imaging technologies.

Share
June 29, 2016

An Automated X-Y Table System for Photo Stitching: Initial Impressions

X-Y Table

I recently took delivery of an automated X-Y table system for our digital production studio at UConn's Homer Babbidge Library. It marked the completion of a process that began back in February when I had first contacted Michael Ulsaker of Ulsaker Studio with my initial specs for a custom rig. The details of how we worked out the final design, its components, and its system integration and automation are topics that I'll be briefly speaking about at Stanford's Cultural Heritage Imaging Professionals Conference next month in the Bay Area.

X-Y tables are used in digital capture for the creation of overlapping image tiles for items that cannot be photographed with a sufficient amount of spatial resolution in a single shot. One of the system's main attributes is that once the analog original is placed down on the table surface it doesn't need to be manually moved from shot to shot. Instead the entire support surface moves programmatically beneath a stationary overhead camera. This results in much less handling by the photographer, far greater throughput, and less wear on the mostly old, mostly oversized, and sometimes brittle formats that require this capture technique.

Additionally, since the table's programmable logic controller can mathematically calculate a consistent percent of overlap among adjacent image tiles, the resulting shots are very precisely photographed. This, in turn, assists Photoshop's Photomerge algorithm to do faster, more accurate image stitching in final post-processing.

Here's a short video that I shot of the newly installed automated system in action. As can be seen, the setup leverages design aspects from the field of robotics and integrates them into studio photography. The 1949 map of New Haven County being captured here is roughly 36" x 49":

After a subsequent trip to Photoshop, the 400ppi image tiles are automatically aligned, blended, and stitched into a new unified image by the software. Indeed the map's edges are in fact not all cut straight (which the composite image accurately depicts)...

1949 Map of New Haven County
Share
April 25, 2016

Black Bear Creates Digital Noise

One of the nice things about living in the middle of the woods is that your house can act as a very large blind. Here it's springtime, and black bears are up and about once again. Tonight, this individual came plodding down one of our back lot trails at a leisurely pace only to find himself walking across the front lawn...

He finally made his way back into the woods, but only after first meandering down the gravel drive towards the road. As it was 7:40PM EST, it was dark and difficult to obtain focus and sufficient shutter speed on these shots. Auto focus was racking wildly back and forth in the poor light and confusing brush, so I flipped over to manual and tried my best through the viewfinder. These were all shot handheld, through our home's double-pane windows with a Canon 5D III, 300mm f/4 IS, at ISO 25600. Lightroom's color noise reduction feature subsequently did a very nice job with the mess a camera sensor can create when set to such a lofty ISO. A higher ISO setting in essence amplifies a camera sensor's light sensitivity. This gain in sensitivity increases the signal (i.e. light) but also elevates noise. Dark areas in a digital image, like a black bear's fur at dusk, can be particularly noisy due to a weaker signal hitting the camera sensor. This results in a lower signal-to-noise ratio (SNR) and an ugly raw image coming directly off of the camera. Thankfully, there are clever post-processing algorithms out there that can discern noise from signal and turn noise into more visually pleasing image data.

As I shot, I kept wondering if this bear was the same one that we had on our deck last year?

Lastly, Tara also took some moving image footage of the encounter with her Samsung Galaxy S6 camera phone. I'm glad the bear didn't mess with my woodshed that I've just finished filling up for a summer's worth of seasoning.

Share
March 26, 2016

Walking Through the Present's Past

This is a fine time of year to be out walking the dog in southern New England as the biting flies and mosquitoes have yet to emerge and get you cursing. Winter's hush still holds sway over woods and field alike, with only occasional breaks for Northern Cardinal and Black Capped Chickadee song. Foliage remains firmly in the bud, leaving the trail-side vistas open through a canopy's bare bones.

The shoulder season is also a prime opportunity to explore the coastline. I have been visiting Rhode Island's Napatree Point sporadically ever since an early September 1986 afternoon when as an undergraduate my animal ecology class took a field trip to the area's sandy stretches to study shorebird feeding behavior. I still have Robert Askins' handouts from the time.

Dr. Askins was a great and demanding professor from whom I really learned how to reason and write more clearly. Essay exams and numerous paper assignments were the norm of the day, and his corrective marginalia were both unambiguous and instructive. The simple and accurately-worded declarative sentence was the aim. Anything less, and you would be hearing about it in red. For example, I'm not sure why I ever thought so little of Mallard flight during the previous spring semester's animal behavior course. And besides, why would anyone use such a vague descriptor as "adequate" in a research paper?

Obviously at 20 years old I was still a muddled writer, banging away on a frighteningly buggy Coleco Adam computer in my dorm room. What follows, however, from the succeeding term's animal ecology final paper assignment was a breakthrough:

At long last, those condensed, crimson-inked coaching sessions were having a positive effect on my writing style (albeit with noted reservations). All told I took three courses with Dr. Askins during my time in New London. Additionally, he served as my senior honors thesis advisor for two more semesters. By my last term, it was OK for me to call him Bob, and his subsequent recommendation helped me secure my first job: a prep school teaching gig in northern Vermont. To this day, he continues to publish authoritative research in the field and to teach at Connecticut College. I wonder what his courses are like now?

As mentioned earlier, I've made a number of return trips back to Napatree Point over the years, mostly in the late winter/early spring, often with wife and one of our huskies. It's a time when the shorebirds have yet to arrive from their long northward migrations, and you can bring your dog to the beach and park for free. Our latest trip there was Timber's first brush with the sea and all things briny.

Napatree's shoreline is extensive, lightly peopled during this season, and makes for an inviting launch pad for a day of fun and investigation. It remains, in essence, as I remember it back in 1986. Some places (and the lessons they impart) never get old, it seems.

Share
February 1, 2016

Revelations of Trail Cam Photography in Winter

Back in early December, I put up a Browning Strike Force trail cam at the intersection of two paths that I had cut 15 years ago through the back of our New Braintree property. The trails meet close to the edge of Mason Pond, a small natural stream impoundment. Over the years, beaver families have come and gone and have further dammed the pond's outlet, thus raising the water level and making it safe for winter skating and for various wildlife to walk across the frozen surface to our wooded shore.

The Browning camera can record not only color images, given sufficient ambient daylight, but can also capture night footage as well through on-board IR illumination. The IR beam is almost invisible, does not spook wildlife (unlike incandescent camera flash), and uses very little energy to trigger. This is particularly helpful when the camera's batteries are subjected to the extended cold of New England winter evenings. Of late, I've been playing with the rig's multi-shot mode which can be set to rapidly fire 2 - 8 shots once the camera's motion detector (also IR-based) is triggered by a passing creature. With these images, I've created a few interesting time-lapse videos in Lightroom. Here are some of our regular guests...

As can be seen, the camera creates informational banners below each image that include temperature, moon phase, date, and time.
This is a great feature that could be made even better if these data points were also written directly into the JPEG images' own embedded metadata structure* rather than by simply forming part of the actual image's pixel real estate. With embedded data you could then sort your images by say temperature range and/or moon phase in order to do some nice rough aggregations in Lightroom or Bridge without having to manually enter this same information yourself. Or, you could even do more sophisticated statistical analysis off of these fields to track species behavior based upon the correlations of your choice. As is, the camera still opens up an interesting window on the ghostly, nocturnal world of animal behavior after dark. Over time I'm getting a better feel for the device's potential as I hone my talents at placing it along our trails for best results...

...because you never know what will show up when you pull the camera's SD card and download the images. Take this one, for example...

*UPDATE (2/2/16): After poking around further, I've now discovered that the camera actually does embed the banner's information. Kudos to Browning for doing the right thing all along. The reason why I didn't notice it at first glance is due to the manner in which these details are stored in the file. For instance, all of the data points are written into a single IPTC Core "Description" field in one concatenated, colon-delimited string:

It's hard to blame Browning for doing this, since there are no pre-existing IPTC fields for things like moon phase and temperature to neatly slot into. Nevertheless, a few incongruities remain worth noting. While the time stamp appears in the image banner using the 12-hour clock convention, it is embedded in the file utilizing the 24-hour clock or military time convention. Additionally, the date conventions differ slightly between banner image (mm/dd/yyyy) and embedded metadata (mmddyy). Finally, where the moon phase is represented as an icon in the banner, it is instead recorded with its corresponding numeric value in the metadata. In any event, the information is there to plumb once you understand the conventions by which it is embedded.

View all blog by month
  • Home
  • Galleries
  • Blog
  • Bio
© Michael J. Bennett